
This guide walks you through installing Content Vault and getting everything set up so customers can:
- Subscribe on your product page
- Manage their subscription
- Access downloads from their customer account (Vault)
By the end, you’ll have:
- Content Vault installed
- The app blocks added to your theme
- Customer accounts + subscription management enabled
- Your first subscription created and active
Step 1: Install Content Vault from the Shopify App Store
- Visit the Shopify App Store
- Search for Content Vault
- Click Install
- Approve the requested permissions
Once installed, you’ll be redirected to your Shopify admin.
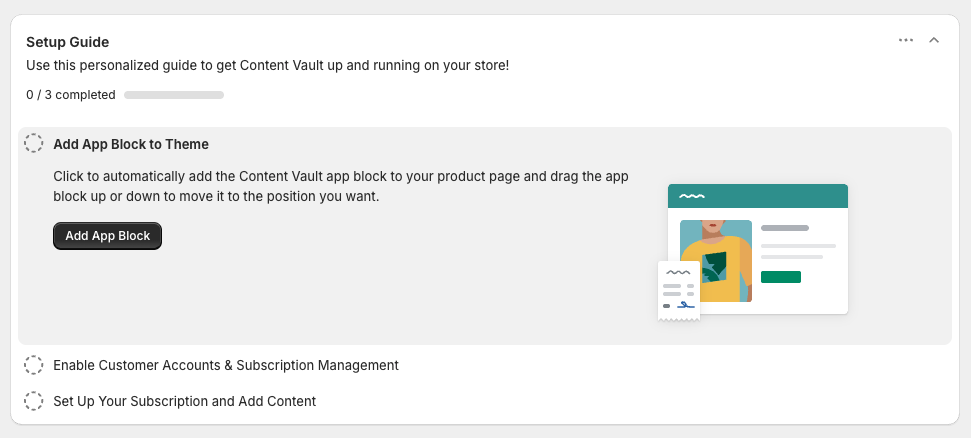
Step 2: Add the Subscription Widget (App Block) to Your Product Page
This is the most important step—this is how customers actually subscribe.
- Go to: Online Store → Themes → Customize
- At the top dropdown (where it may say “Home page”), switch to Products → Default product
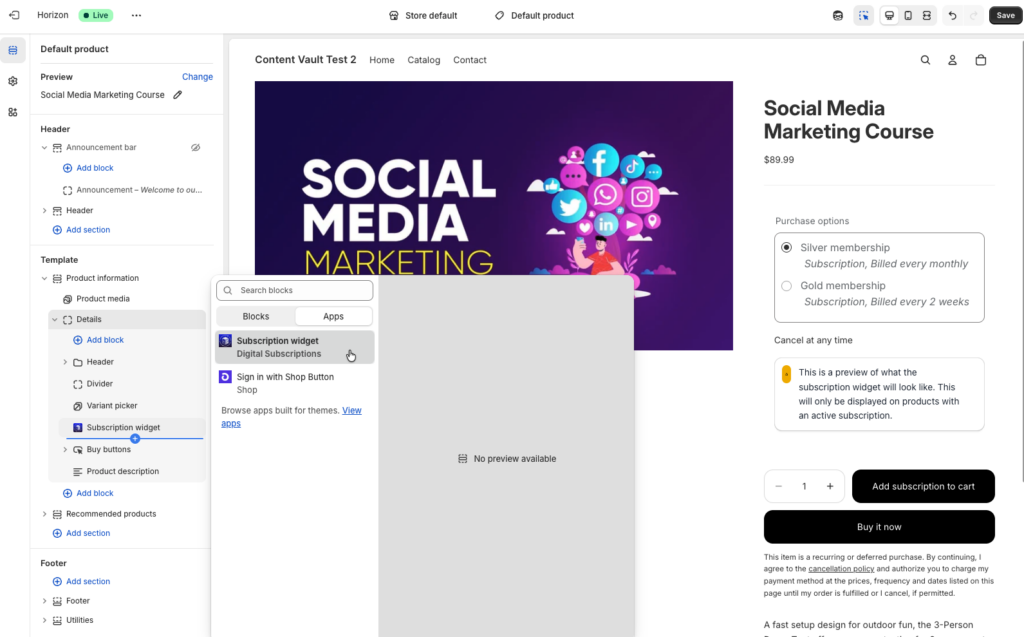
(or select the product template you’re using) - Click Add block
- Click Apps
- Select Content Vault – Subscription Widget (name may vary slightly)
- Place it where you want it to appear (usually near the Add to Cart area)
- Click Save
✅ After this is added, the widget will appear once you create + activate a subscription for that product.
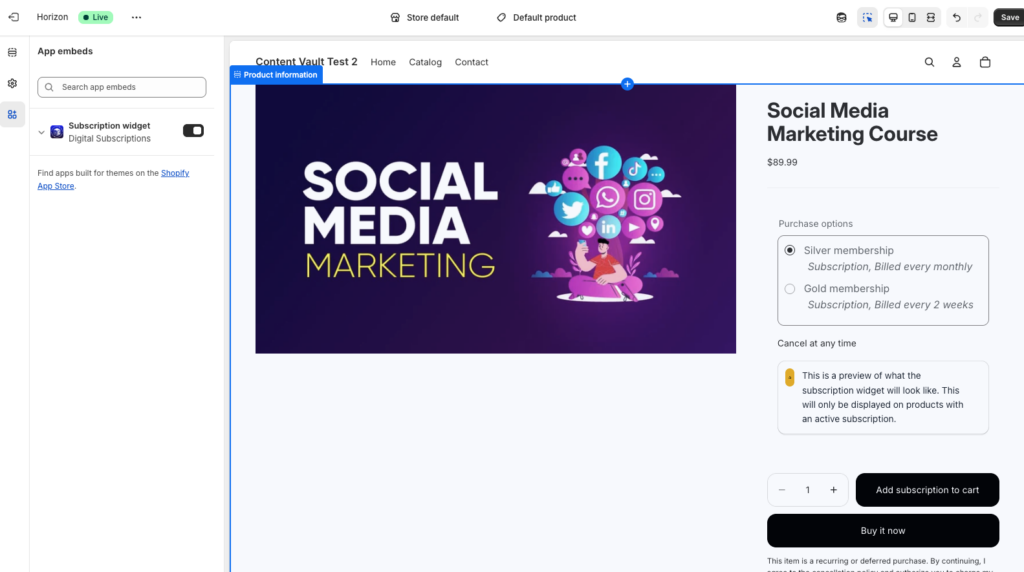
Step 3: Enable the Content Vault Theme Extension
- In Shopify, go to: Online Store → Themes
- Click Customize
- Click App embeds (left sidebar)
- Find Content Vault and toggle it On
- Click Save
This enables Content Vault’s storefront functionality.
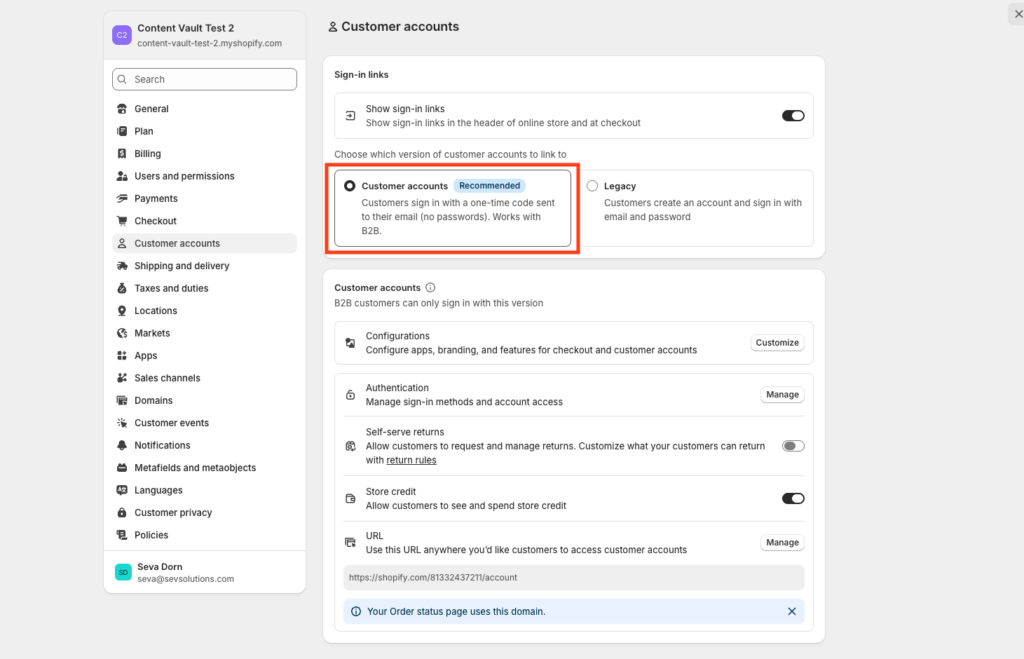
Step 4: Enable Customer Accounts
Content Vault uses Shopify’s new customer accounts so customers can log in and access their content.
- Go to Shopify Admin → Settings → Customer accounts
- Enable Customer accounts
- Make sure you are using new customer accounts (not legacy). This is usally enabled by default on new Shopify stores.
Step 5: Add the Required Blocks in Checkout & Customer Accounts
After clicking Enable Customer Accounts Extension in the Setup Guide:
- Click Checkout at the top of the Theme Editor.
- In the left sidebar, you’ll see the Digital Subscriptions section with:
- Subscription management
- Order action button
- Order status page
- Order thank you page
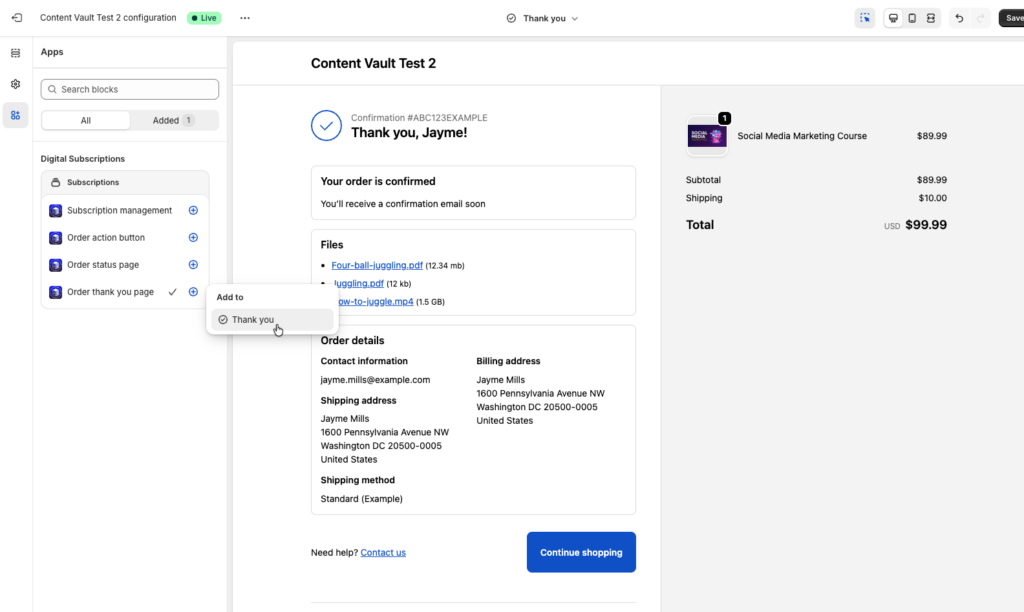
To add a block:
- Click the + icon next to the block.
- Select the page (for example: Thank You).
- The block will automatically be added to the correct page.
You do not need to manually place it in the right section — Shopify automatically inserts it into the proper location for:
- Customer account / subscription management page
- Order page
- Thank You page
- Order Status page
Just repeat this process for each required block.
Once added and saved, customers will be able to:
- Manage subscriptions from their account
- Take actions on subscription orders
- See confirmation details after checkout
Step 6: Create Your First Subscription
- Go to Content Vault → Subscriptions
- Click Create subscription
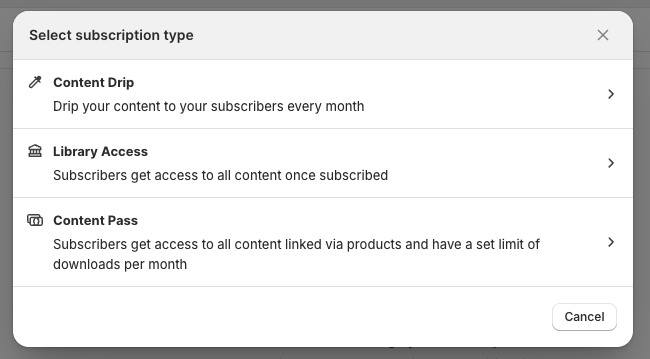
- Choose a subscription type:
- Content Drip (scheduled delivery)
- Library Access (access-based library)
- Content Pass (download allowance per billing cycle)
Step 7: Configure Subscription Basics
After selecting your subscription type, you can configure the basic settings for your subscription.
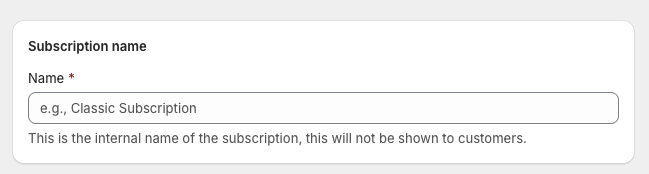
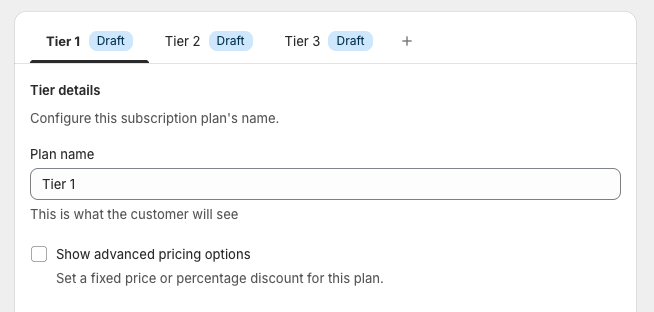
1. Set Subscription Name
Enter the internal name of your subscription.
This is for your reference inside Content Vault (customers won’t see this name directly).
2. Select the Subscription Product
Choose the Shopify product that will power this subscription.
This is the product customers will purchase on your storefront.

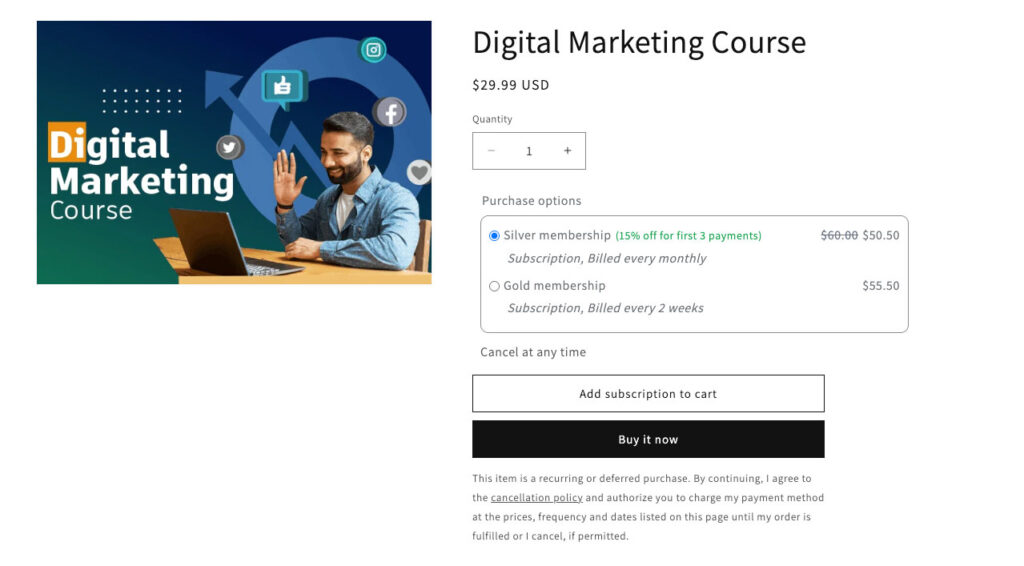
3. Create Tiers (Optional)
Tiers allow you to offer multiple plans under one subscription product.
For example:
- Basic vs Pro
- Monthly vs Annual
- Standard vs Premium access
Each tier can have its own:
- Price
- Billing frequency
- Access behavior
- File delivery settings
Customers choose their tier directly on the product page.
If you only need one plan, simply keep a single tier.
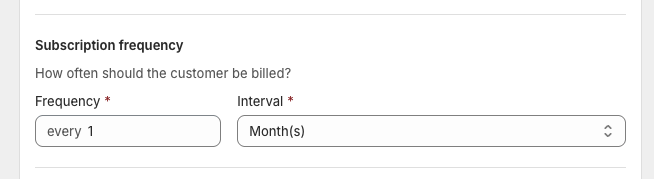
4. Configure Subscription Frequency
Set how often customers are billed:
- Monthly
- Yearly
- Custom interval
This controls recurring billing for each tier.
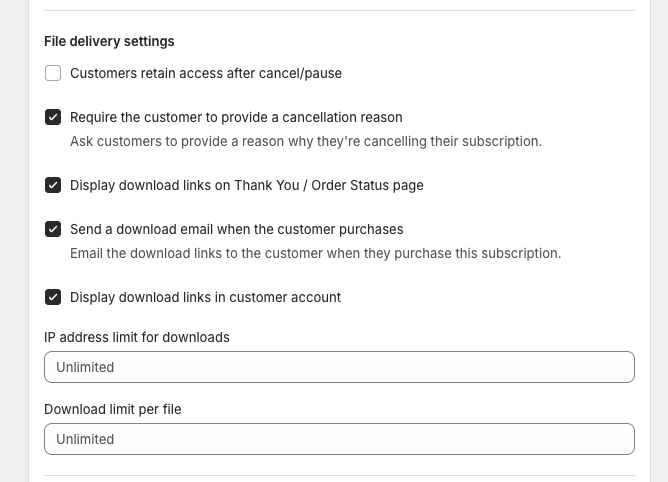
5. Configure File Delivery Settings
Define how customers receive access to content:
- Immediate access or delayed access
- Access retained after cancellation (optional)
- Email notifications
- Account-based access
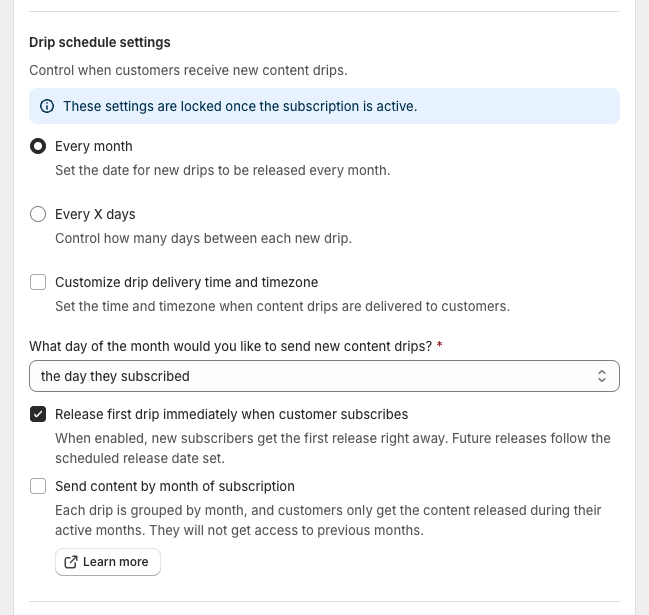
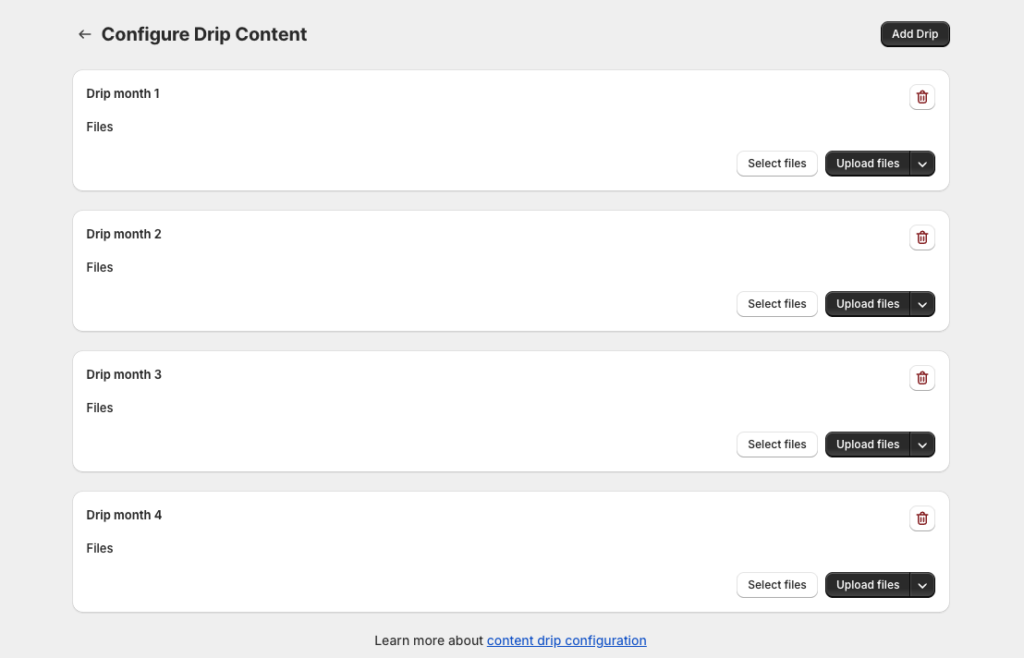
If using Content Drip, this is also where you configure your drip schedule.
6. Click Save
Once your subscription structure is complete, click Save.
Step 8: Attach Content (Files / Drip Schedule / Downloads)
After saving, you’ll be able to configure content depending on the subscription type:
- Content Drip: build your drip schedule and assign files
- Library Access: assign files to each tier
- Content Pass: link products/files and configure download limits
Each tier is configured independently.
Step 9: Activate and Test
- Set the subscription status to Active
- Visit your product page and confirm the widget appears
- Do a quick test checkout (use a discount code if needed)
- Confirm:
- Customer receives the expected emails
- Customer can log in and access content via the Vault
- Subscription management controls appear
Next Steps
If anything looks off during setup, reach out in live chat — we’re happy to help you get it dialed in.