
A Content Drip Subscription lets you deliver digital content to customers over time while Content Vault automatically handles subscription billing, access control, and file delivery.
This setup is ideal for:
- Memberships
- Courses
- Recipe clubs
- Digital publications
- Coaching programs
- Ongoing content libraries
This guide walks through every step, including newer features like tiers, advanced pricing, custom delivery time & timezone, and month-based content delivery.
What Is a Content Drip Subscription?
A Content Drip Subscription allows you to:
- Charge customers on a recurring basis
- Release content on a fixed schedule (daily, weekly, monthly, or custom)
- Control when and how customers access files
- Manage everything from a single system (billing + delivery)
Unlike one-time digital downloads, drip subscriptions are designed for ongoing access and scheduled releases.
Step 1: Create a New Content Drip Subscription
From your Shopify admin:
Apps → Content Vault → Subscriptions → Create Subscription → Content Drip
Give your subscription an internal name.
This name is not shown to customers.
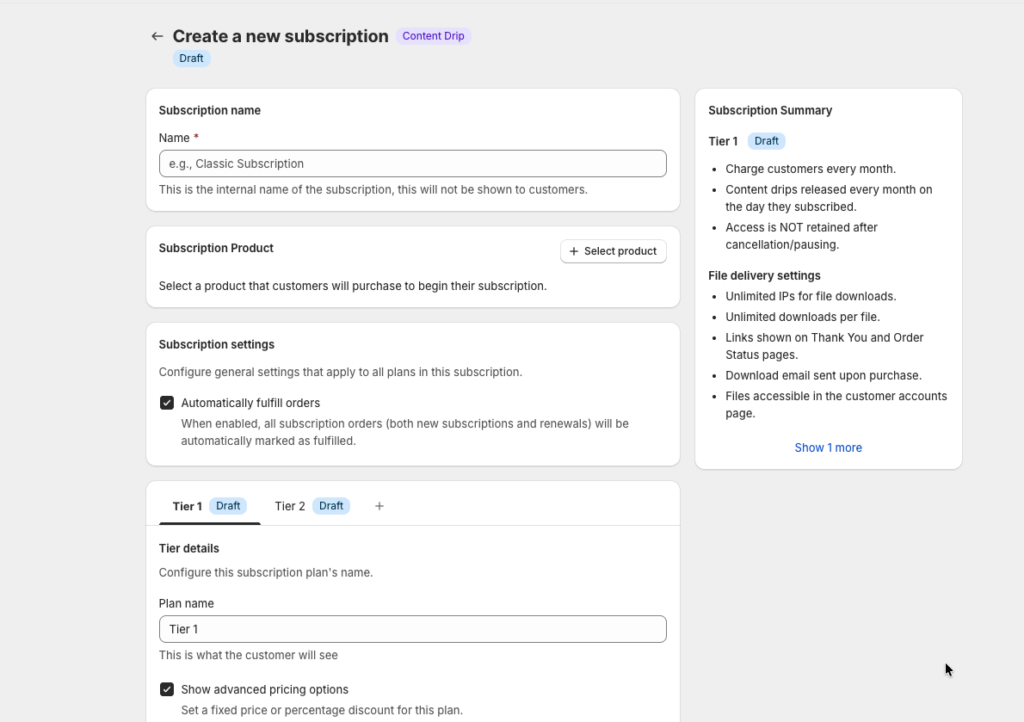
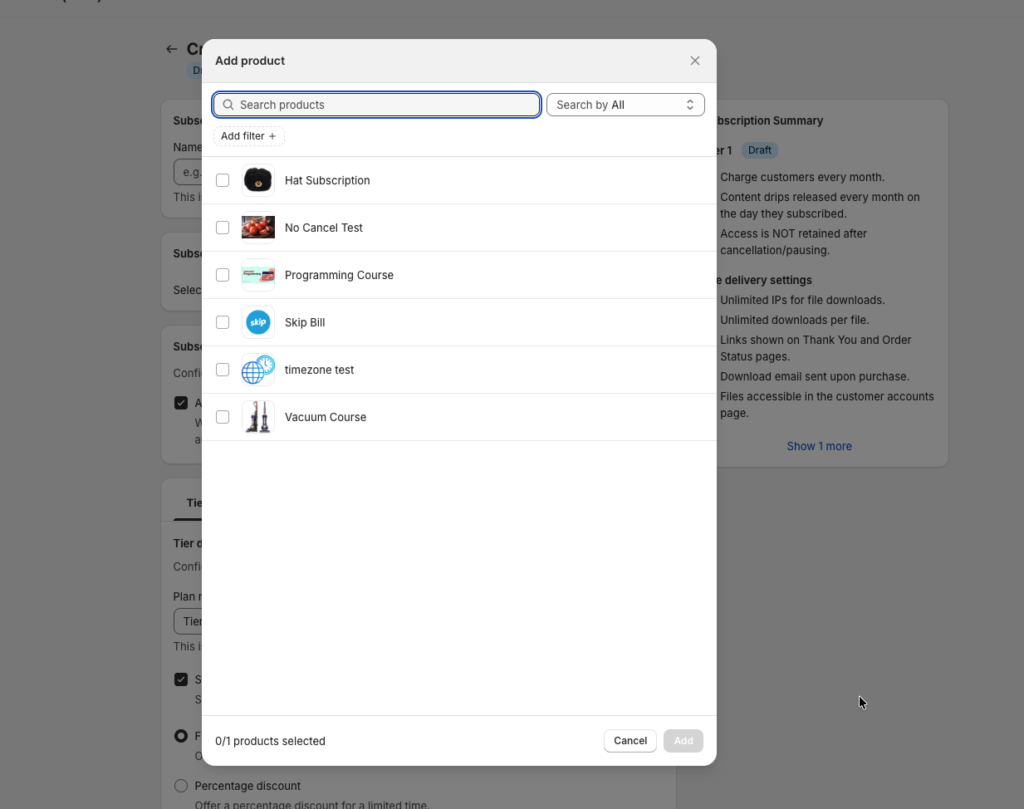
Step 2: Attach a Shopify Product
Select the Shopify product customers will purchase to begin their subscription.
This product acts as:
- The checkout entry point
- The billing anchor
- The access trigger for all drip content
💡 You only need one product, even if you plan to offer multiple plans using tiers.
Step 3: Configure Subscription Tiers (NEW)
Content Vault supports multiple tiers within a single subscription.
This allows you to:
- Offer different prices (weekly / monthly / yearly)
- Create plan-based access (e.g. Silver, Gold, VIP)
- Avoid duplicating products
Each tier has its own:
- Customer-facing name
- Billing frequency
- Pricing rules
Each tier has its own drip content schedule. If you want tiers to deliver the same content, you’ll need to configure the drip files for each tier.
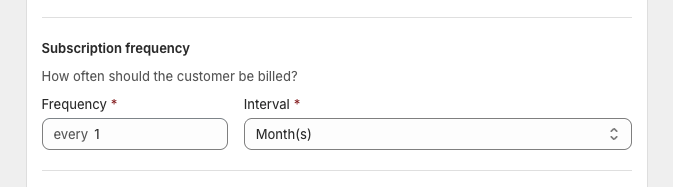
Step 4: Set the Subscription Billing Frequency
Before configuring when content is delivered, you must define how often the customer is billed.
In the Subscription Frequency section, choose:
- Frequency – how often the charge repeats
(e.g. every1,3,12) - Interval – the billing unit
(Days,Weeks,Months,Years)
Examples:
Every 1 Month→ Monthly subscriptionEvery 1 Year→ Annual subscriptionEvery 3 Months→ Quarterly subscription
This billing schedule controls:
- When customers are charged
- When renewals occur
- How Shopify records the subscription lifecycle
💡 Important:
Billing frequency is independent of drip delivery.
You can bill monthly but deliver content weekly, daily, or monthly.
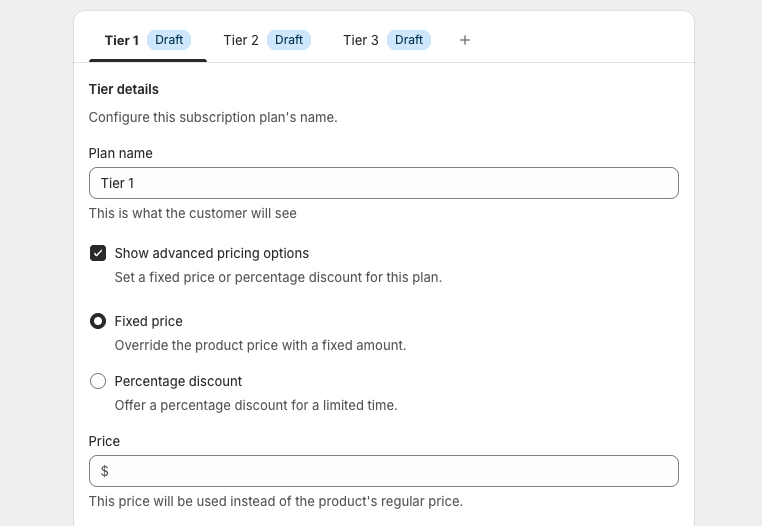
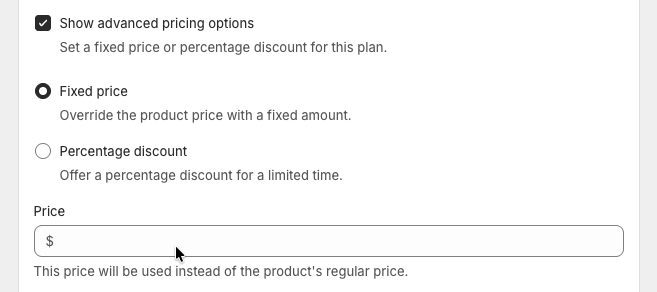
💰 Step 5: Advanced Pricing Options (NEW)
Each tier can override the product’s default price using advanced pricing.
Available options:
- Fixed price (replace the product price)
- Percentage discount
This means:
- Your Shopify product can have a placeholder price
- Each tier defines its actual subscription price
Perfect for:
- Monthly vs yearly pricing
- Promotional plans
- Legacy or discounted tiers
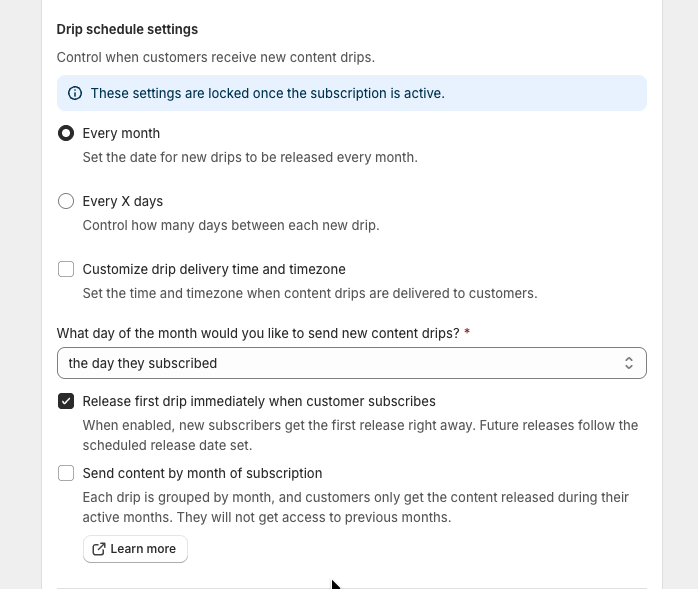
Step 6: Configure Drip Schedule, Time & Timezone
Control exactly when content is released.
Drip Frequency
- Every month
- Every X days
Delivery Time & Timezone (NEW)
Optionally set:
- A specific delivery time
- A timezone for content release
This ensures content drops consistently, regardless of where customers are located.
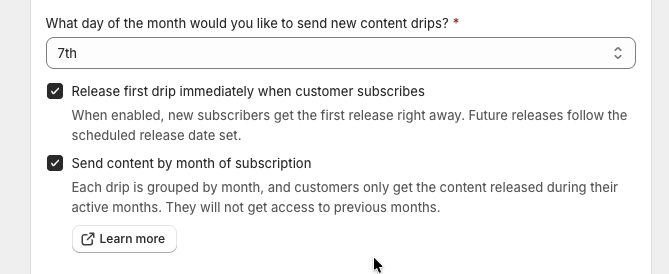
Step 7: Month-Based vs Subscriber-Based Delivery
This setting determines how customers receive content.
Option A: Subscriber-Based Timeline (Default)
- Each customer progresses from their signup date
- Best for structured courses or programs
Option B: Send Content by Month of Subscription
When enabled:
- All active subscribers receive the same month’s content
- New subscribers immediately receive the current month’s content
- Previous months are not automatically unlocked
Ideal for:
- Monthly memberships
- Recipe clubs
- Publications
- “Everyone gets March’s content” models
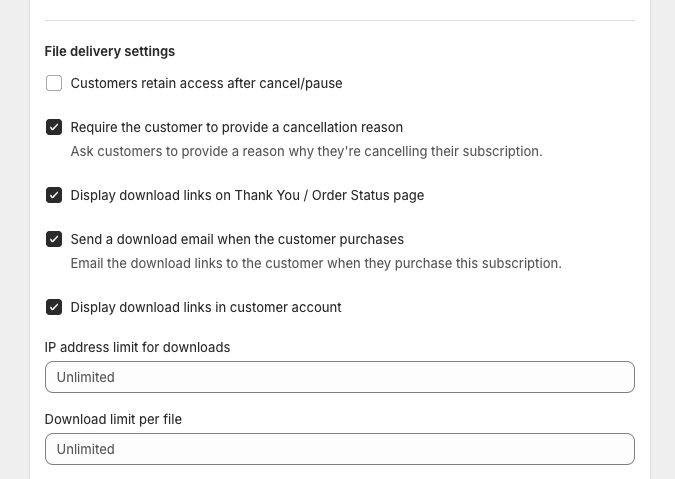
Step 8: Configure File Delivery & Access Rules
Control what happens when a customer cancels or pauses:
- Customers retain access after cancel/pause
- Show download links on:
- Thank You page
- Order Status page
- Customer account page
- Optional download limits (IP or per file)
This gives you full control over post-cancellation behavior.
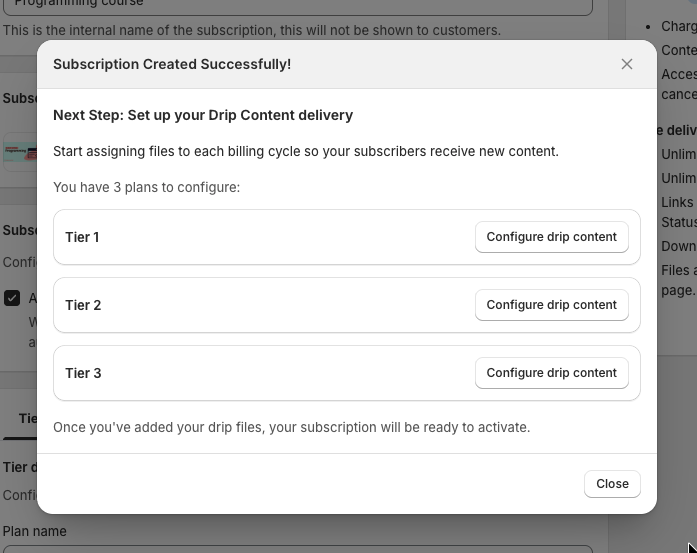
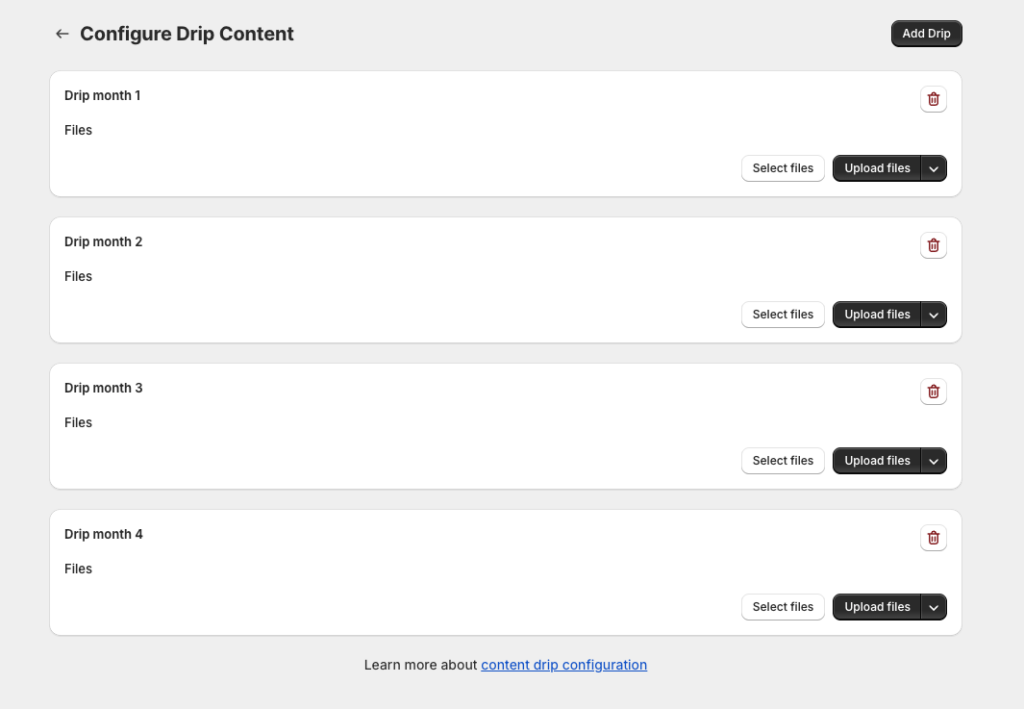
Step 9: Build Your Drip Schedule
Before you can assign drip files:
👉 Click “Save subscription”
After saving, you’ll see a list of tiers with a Configure drip content button.
For each tier:
- Click Configure drip content
- Add drip periods (e.g. Month 1, Month 2, Month 3)
- Upload or assign files to each drip
- Add or remove drip periods as needed
Each tier can have:
- Its own drip schedule
- Its own files
- Its own progression
Step 10: Activate Subscription
Once all tiers have drip files assigned:
- Click Set active
- The subscription is ready for customers
⚠️ Note: Drip schedule schedule settings are locked once the subscription is active.
Final Notes
- Content Vault handles billing, access control, and delivery together
- Drip timing and billing are intentionally separate for flexibility
- Tiers allow multiple pricing plans without product duplication
If you need help choosing the best setup for your use case, feel free to reach out via live chat — we’re happy to help you get this dialed in.