A Drip Subscription allows content to be released gradually over time, instead of giving subscribers immediate access to all files. This is ideal for:
- Online courses
- Membership content
- Scheduled content drops (weekly, monthly, etc.)
Step 1: Create a New Drip Subscription
- Navigate to the Subscriptions page in the Content Vault dashboard.
- Click Create New Subscription.
- Select Content Drip.
- Enter the following details:
- Name & Description – Explain what customers will receive.
- Subscription Product – Choose the Shopify product customers will purchase to subscribe.
- Billing Frequency – Decide how often customers are charged (e.g., weekly, monthly).

Click Save Subscription to continue.
Step 2: Configure Drip Schedule Settings
The Drip Schedule determines when subscribers receive new content. (Note: Once a subscription is active, these settings are locked and cannot be changed.)
You now have two scheduling options:
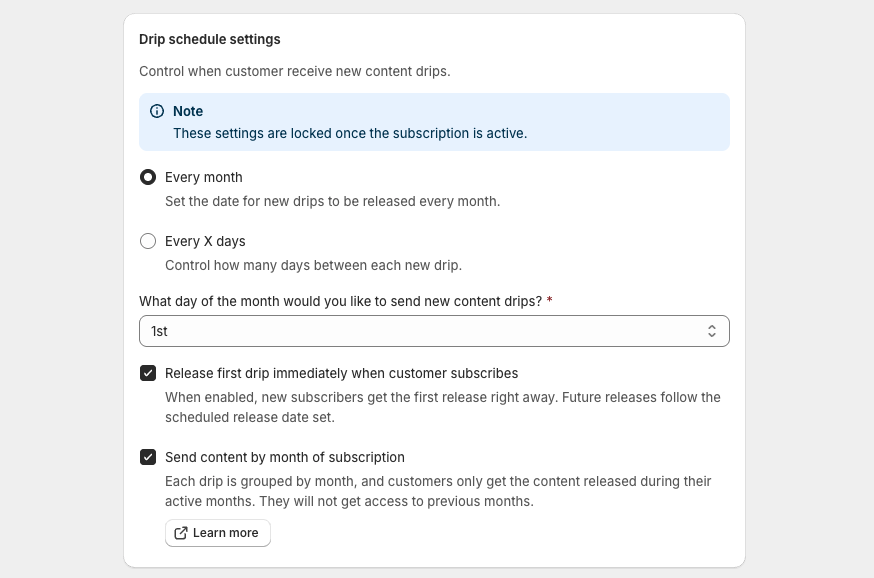
1. Every Month
Set a fixed day of the month for each new drip to be released.
- Choose a specific date (e.g., the 1st, 15th) or select “the day they subscribed.”
Optional settings:
- Release First Drip Immediately – When enabled, new subscribers get their first drip right away, then follow the monthly schedule.
- Send Content by Month of Subscription ⚡ (New) – Each drip is grouped by calendar month. Subscribers only receive content for the months they’re active. They will not get access to previous months.
👉 Example: If someone subscribes in November, they’ll get the November drip (and future months), but not October’s.

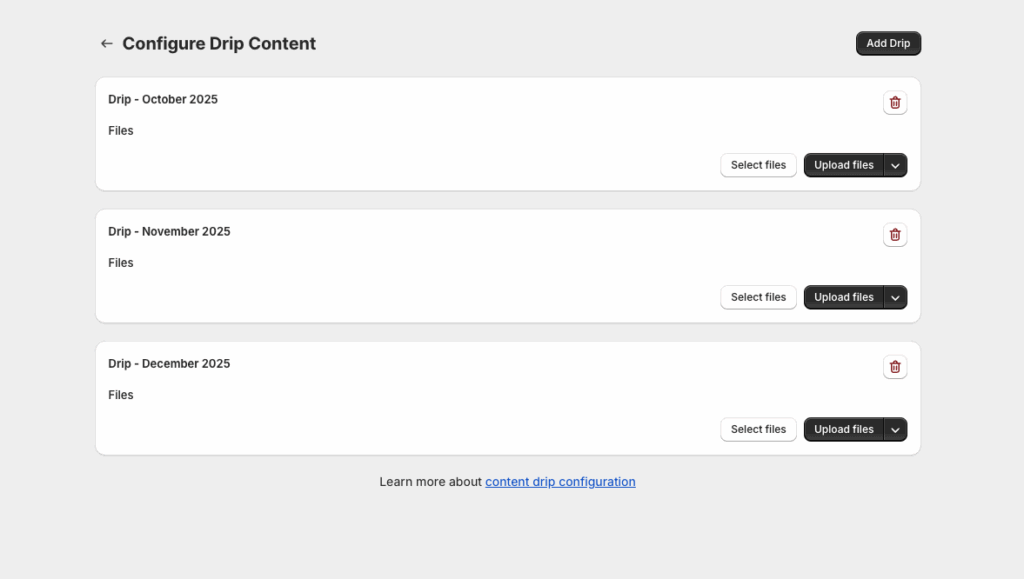
When “Send Content by Month of Subscription” is enabled, the drip configuration screen will display content grouped by month (e.g., October, November, December).

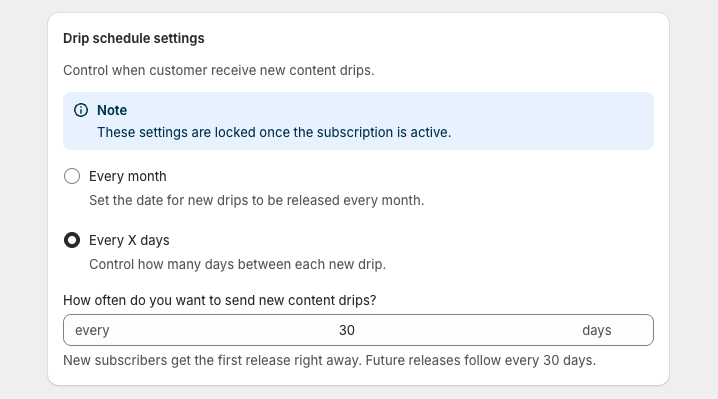
2. Every X Days ⚡ (New)
Instead of a fixed calendar date, you can now release content on a rolling schedule (e.g., every 30 days).
- Subscribers get their first drip immediately when they subscribe, then follow the rolling interval you’ve set (e.g., every 30 days, every 10 days, etc.).

Step 3: Configure Access Rules
Control how subscribers access their digital content:
- Retain Access – Let customers keep files after canceling (or disable so access ends with cancellation).
- Show Download Links – Decide if download links appear on the Thank You page and in the customer account page.

Step 4: Configure File Delivery Settings
Prevent unauthorized file sharing by limiting access:
- IP Address Limits – Restrict the number of unique IP addresses that can use download links.
- Download Limits per File – Limit how many times each file can be downloaded (leave blank for unlimited).

Step 5: Build Your Drip Schedule
After saving the subscription, you’ll see a confirmation popup with a Drip Configuration button.
- Click Drip Configuration from the popup or use the Drip Configuration button in the sidebar.
- Click Add Drip to create release blocks (e.g., Week 1, Month 2, etc.).
- Assign the schedule for each drip to control when files unlock.

Step 6: Upload & Assign Files
- Inside each drip block, click Upload Files.
- Add the digital products you want delivered in that drip.
- Save your changes.

Step 7: Configure Automated Emails
Still in Settings, scroll to Email Templates. Customize automated emails for:
- New Subscription Drip
- Subscription Canceled
- Payment Failed Notification
- Renewal Reminder

📖 Learn more: Configuring Subscription Emails
Next Steps
That’s it! 🎉 Your Content Drip Subscription is now live. Customers will automatically receive new content according to your configured drip schedule.
You can continue adding drips, updating files, and managing subscribers directly from the Content Vault dashboard.
✅ Tip: You can configure billing retry rules and failed payment handling in the Settings page of Content Vault. This ensures smooth renewals and reduces churn. Learn more in our guide: Handling Failed Payments & Cancellations.

